Firmware version tracking
Introduction
FlashMyPico includes an optional convenience feature that lets you track the firmware versions installed on your devices. Use cases include situations in which:
- your project requires synchronized firmware across multiple chips
- you'd like to know whether it's the right time to turn off an old version of an on-line API (eg. all of your users have already updated their devices)
- you'd like to know which of your devices remain to be updated
In this document I'll guide you through the process of enabling this feature for your project. Please follow the steps listed in the uploading & flashing chapter before you start.
Step 1: Registering your board

- Navigate to the settings tab, then click boards in the navigation bar.
- Enter your board's label. This can be any name that helps you identify this particular board.
- Plug in your board while holding the BOOTSEL button, then click the detect Chip ID button. This should leave you with the Chip ID input field filled in.
- Click the create entry button.
- You should now see a new board entry, with its firmware status unassigned.
Step 2: Assigning your board to a project
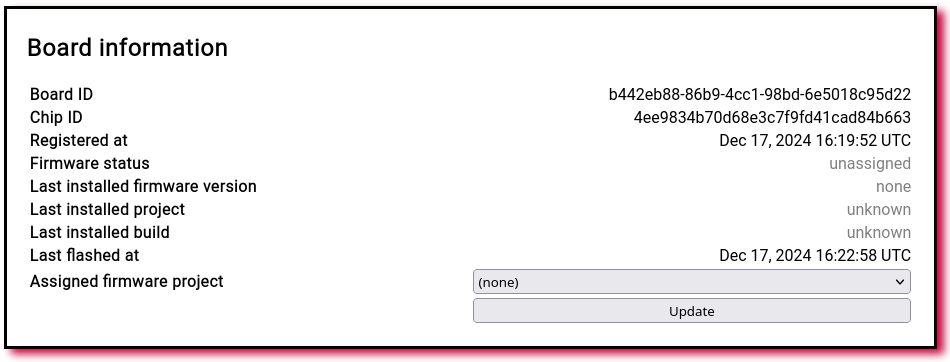
- Still in the boards tab, press the inspect button right to your board's label. You'll be redirected to the board information panel.
- Select your project from the assigned project drop-down menu, then click update.
- Your board's firmware status should now be unknown, as the board hasn't been flashed yet.


Step 3: Flashing the board
This step depends on your assigned project containing at least one firmware build.
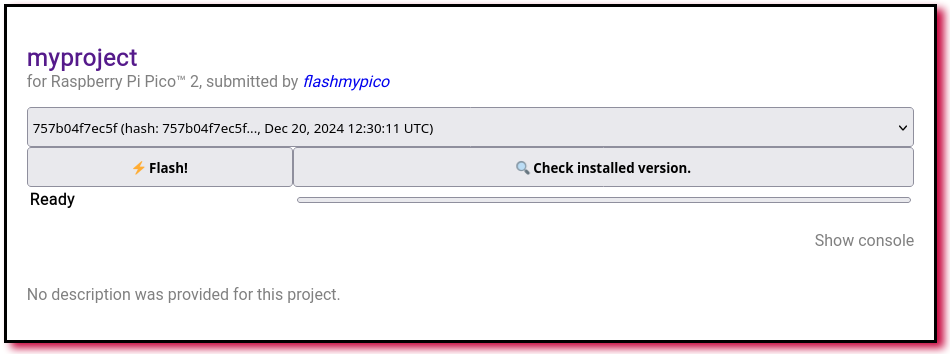
- Navigate to your assigned project's flashing web page. You will find it by navigating to the projects tab first, and then clicking your project's title.
- Enter your target board's bootloader by connecting it while holding the BOOTSEL button, then click flash. Wait until this operation has been completed.
- Return to the boards by first clicking settings in the navigation bar at the top.
- You should now see your board listed with it's firmware version up-to-date.


Step 4: Uploading newer firmware (optional)
In this step we'll take a closer look at what happens when your board's firmware goes out of date.
- Navigate to your project's builds tab by clicking the projects link in the navigation bar, then clicking the inspect button, and finally clicking the builds link.
- Upload a new firmware build. This could be the same UF2 image, as it's the upload date that counts in this case.
- Navigate back to the boards tab. Your board's firmware status should now be marked as outdated. You'll find the last installed version linked in the board information tab. To access it, click inspect.
